
I like to think back to when I would leave the house in my 20’s, carrying a purse with a phone, wallet, chapstick, and set of keys. The only addition upon returning a few hours later? An oversized styrofoam cup full of Sprite. A small portion of my kitchen counter would serve as the drop zone, and had zero impact on my mental health.
Then I had kids.
I can’t blame them, entirely. As our life grew, and we invested time and energy into making that life something we love, more things came into our home. The drop zone itself didn’t grow, but the number of things that landed there, did. Our family of 4 has backpacks, lunch bags, jackets, hats, gloves, keys, and So. Many. Shoes. We also do not have a mudroom or dedicated foyer, so the area in our kitchen just inside the door to the garage gets pretty wild.
A blank wall about 4 feet wide, 8 feet tall, and only about 15 inches of free space in front of it, has served us very well over the last 3 years. With such a specific amount of space to work with, this felt like the perfect opportunity to try and make my first piece of custom furniture.
Goal: Chaos, but make it aesthetic.

More storage is not always the solution to the problem of clutter. Since this was going to be a custom size, I put a lot of thought (probably too much, honestly) into what we actually needed.
The biggest things were the backpacks. Even my wife and I have backpacks that are used regularly. J is in school, and little E has grown out of his diaper bag. I carry a small bag on a daily basis, and leave the house in a hat about 50% of the time. K has multiple pairs of sunglasses, although she only wears one. J requires gloves and a beanie if the weather dips below 65, and Martha (the pup) has a leash and harness.
I drew out something I thought would work for us.
Step 1. Measure and Draw
I really try to plan ahead, as accurately as possible, and I love the Freeform App.
To start, I measured out the area, and took some notes.
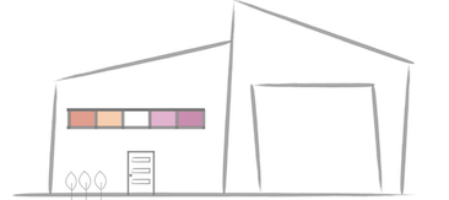
Starting with the full wall, I drew out how I wanted to see the space. I wanted to keep it as close to accurate as I could. My goal would be to see the whole project through, without any big surprises. I’ll let everyone make their own decision about how well that worked out.
To give me the most amount of storage, I wanted to give it almost the full width of the wall. The height was a little bit tricker, but I started with how much room I needed in the cabinet. Enough for backpacks to hang, and still leave room for the shoes on the bottom.
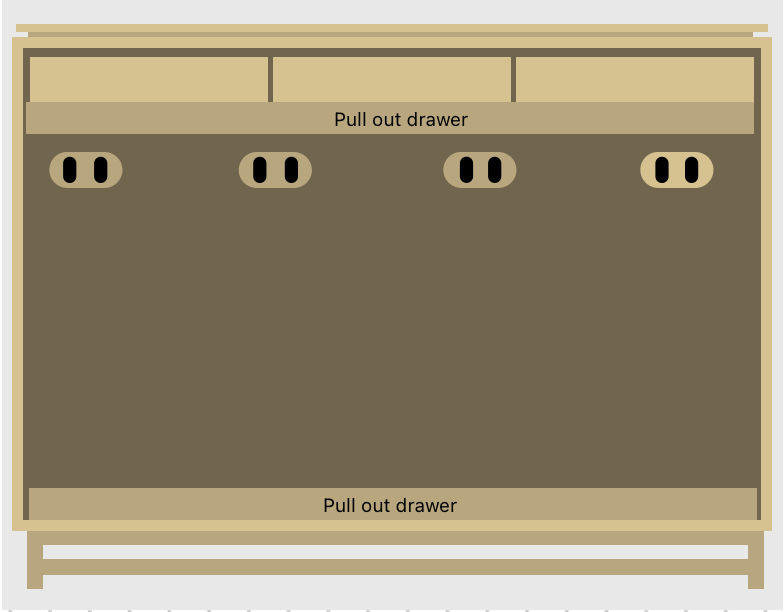
Then, looking at our current 3 hook system, I saw random things stacked and balanced all around. Things that needed to be put in the car, taken to school, or just things that we needed occasionally, but still made sense to keep close by. That’s when I decided that having a drawer was a necessity.
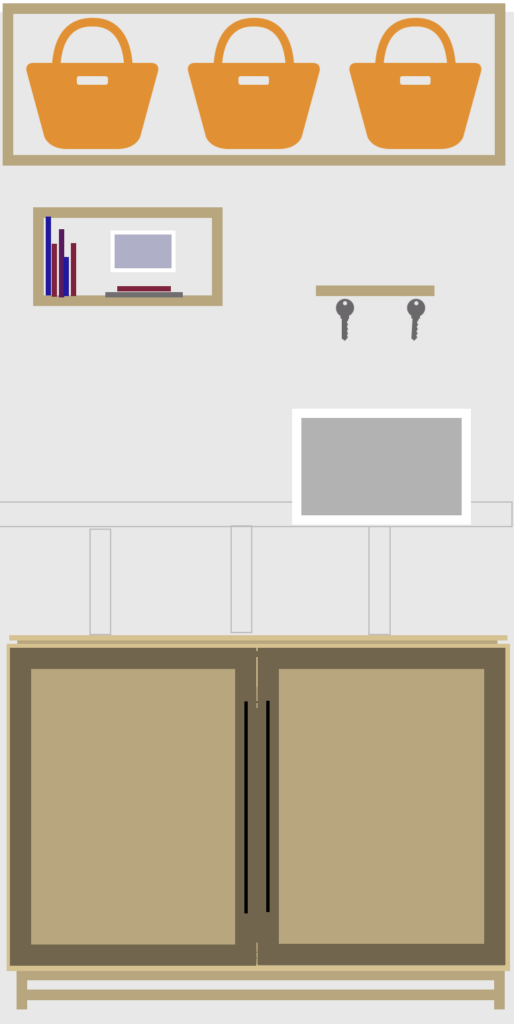
I drew it out in pieces. First the cabinet itself, then filled in with the shape of the drawer and finally adding the cabinet doors and a base.
I got excited and framed out the surrounding wall. We were just gifted a Skylight calendar, and admittedly, that inspired the whole thing. A small shelf for key hooks, and a place to add baskets for more seasonal items.
Step 2. Materials
This has to be where I struggle the most. Plywood, softwood, hardwood, boards, beams, posts. Up until this project, I honestly just didn’t understand what the difference could possibly be.
Here’s what I learned; don’t use softwood. It’s not worth it, and will make you feel like you are not meant to DIY.
Optimistic Ashley, however, went with softwood. For my first custom build, and as someone who has never made a perfect 90 degree angle, I thought I was saving myself from ruining an expensive piece of wood.
What I learned in the long run, is that it’s easier to ruin the softwood. Had I opted for Birch or Oak to begin with, it would have been more forgiving of my amateurism.
I started with one 3/4in x 4′ x 8′ piece of Plywood, and planned all of my cuts to fit on the one board.
Step 3. Planning my cut list.
I really wanted to take my time with this project. I could only contribute 1-2 hours on it at a time. For someone who has done a lot of woodworking, that would be enough time to make some big progress, but for me, it was just barely enough to figure out where I left off.
With a near-perfect piece of plywood, I marked out my first cut. This was the plan:
Total Cabinet Dimensions: 48″ wide x 36″ tall x 15″ deep
Cut list:
Top – (1) 48in x 15.5in – this measurement seems odd, but I will explain!
Bottom – (1) 46.5in x 15in – This needed to be 1.5 inches less than the total width to account for the sides
Sides – (2) 36in x 15in
Top Supports – (2) 46.5in x 3in, (1) 9in x 3in
Top Supports II – (2) 41in x 3in, (2) 14in x 3in
In true overcommitment fashion, I had seen someone do a floating top to their cabinet, and obviously thought it was something I could handle. More importantly, it was something I could accomplish without buying any additional wood, so figured it was worth a shot.
Step 4. Making the cuts.
I do not have a table saw, which would have been ideal. I am also incapable of cutting a straight line freehanded. One of the best options is a circular saw guide rail, but coming off post Christmas spending, I wanted to see if I could make it work with what I had.
So after I measured out my first cut, using scrap 2×4’s to give me some height off the ground, I laid the full sheet down. With enough support under the sheet, I adjusted my circular saw blade to be just deep enough to cut through the 3/4in plywood.
I grabbed my 4 ft level, and a couple of clamps. I rested the blade just outside of my cut line, and when it was in the correct spot, I placed the level alongside the guard of the saw. This is usually 1.5 – 1.75″ away from your cut line, depending on whether you are trying to cut on the inside or outside of your line.
Using the clamps, I secured the level to both sides of the plywood, then double-checked that my blade would still cut right where I needed it to.
After that, I slowly cut with the guard slightly pressed up against the level. I got a straight line all the way down, success!
Using the same method, I cut the width of the two sides and the top of the cabinet.
Next, I made a few 3-inch-wide pieces for support. There were still cuts to be made to correct the height of each piece, but once I was able to break down the large piece of plywood, I could start move my setup to a worktable.
Using a shorter piece of scrap wood, I followed the same (tedious) process to get the height I needed on each piece. Next time around, I will definitely buy myself a saw guide, but this was a great option!
Step 5. Adding Pocket Holes
Of all the reels and YouTube videos I’ve watched, I realize that there are way too many ways to join a piece of wood. It’s really dependent on how much weight will be on it and what you want it to look like visually.
For this project, I needed a strong hold, but also still wanted it to be aesthetically pleasing, and pocket holes seemed like the best way to go.
Keep in mind, I’m already on day 3 of the project. I was able to take a day off to focus on getting all the cuts right, which saved me a lot of time not having to set things up repeatedly. At this point, I was was only able to give a little bit of time each day.
Visually, I had to flip pieces and add little pencil marks to know what was up/down/left/right, and I used arrows to give myself a guide on where to put the pocket holes.
If you haven’t seen those Kreg pocket-hole jig stations, they are pretty wonderful. I do not have one of those. I have a single pocket hole jig, no clamp included. Now, I didn’t count the number of pocket holes I needed, but a thousand feel accurate.
Starting on the bottom piece, I added 8 total to the underside of the bottom piece, 4 on each side. This was to connect it to the sides, while still staying completely hidden.
I also added 2 to each end of the 3in-wide supports (except the two 14×3 in pieces).
Step 6. Screwing it all together.
I passed on the circular saw guide and the fancy pocket hold jig, but I would not be able to deal with it if my cabinet was slightly leaning in one direction. So, off to Harbor Freight to pick up some corner clamps.
When I was researching corner clamps, I was shocked by the number that existed. Most of the difference is in how versatile the clamps are, and how easily they can be locked in position.
I took my time securing each side to the bottom piece of plywood, and adding the two long supports on top. I stood back and admired a perfectly square box.
Next, I connected the pieces being used as a spacer for the top of the cabinet.
Step 7. Adding Edge Banding
I was really excited and nervous about this part. I watched and read a few examples and decided to give it a shot.
Cutting a piece of edge banding slightly longer than needed, I started pressing with a hot iron. Here’s what I learned the hard way:
- It’s better to lift the iron as you move it down the edge. I noticed when I just tried to slide it that I was pulling the edge banding with the iron.
- Hold it for just a bit longer than you feel you need to. Not long enough to burn anything, but enough to be sure that the glue is heated.
- Pressing the edge banding down is the most important part. As the glue starts to cool, I used a scrap piece of plywood to push it down, focusing on even pressure across all parts of the edge.
Once the edge banding was on, I snagged a edge trimmer and started to take off the small amounts of excess. Don’t worry, I also messed this up.
- Too much uneven pressure would push the blade into the piece of plywood and take out little chunks. (This is where a hardwood would have been easier to work with.)
- Light pressure and multiple runs was the right start for me. By the time I got to the last piece, I was much more comfortable.
- Don’t put the iron away just yet. Wait for everything to cool, and do a feel test all the way around. You’ll be able to catch any un-stuck portions and be able to address those before getting any further.
Step 8. Sanding it down.
I’d like to introduce you to this projects MVP, Wood Filler. I used it between a lot of steps to help repair little dents and scrapes. (Again, choose strong plywood.)
After sanding the filler, the edges, and the surface of everything, I was able to connect the top of the cabinet. First, by screwing the spacer piece into the top piece, and then lining everything up with the cabinet before locking those pieces together.
No one was as proud as I was with completing the basic shape of the cabinet.
Step 9. Adding support and building a base
Before getting distracted for a couple of weeks, I used some of the extra plywood to make a few 3-inch wide supports for the back.
I knew I would hang backpacks inside of the cabinet, so this gives me a sturdy place to add the hooks.
Lastly, using some 2×2 and 1×2 I cut, assembled and stained a small base. I aligned the feet on the front edge of the cabinet, knowing that the doors wood give it some depth, and about two inches shorter width wise so that they weren’t right up against the edges on the side.
I secured the supports and screwed on the base, and there she was, a cabinet ready for doors.
Since this is about when our bathroom decided it needed attention, it seems like a perfect place to end Part 1.