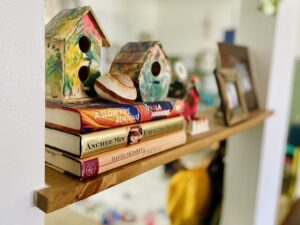
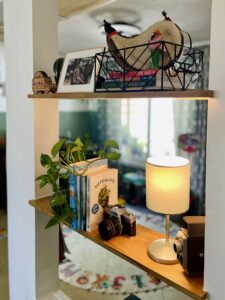
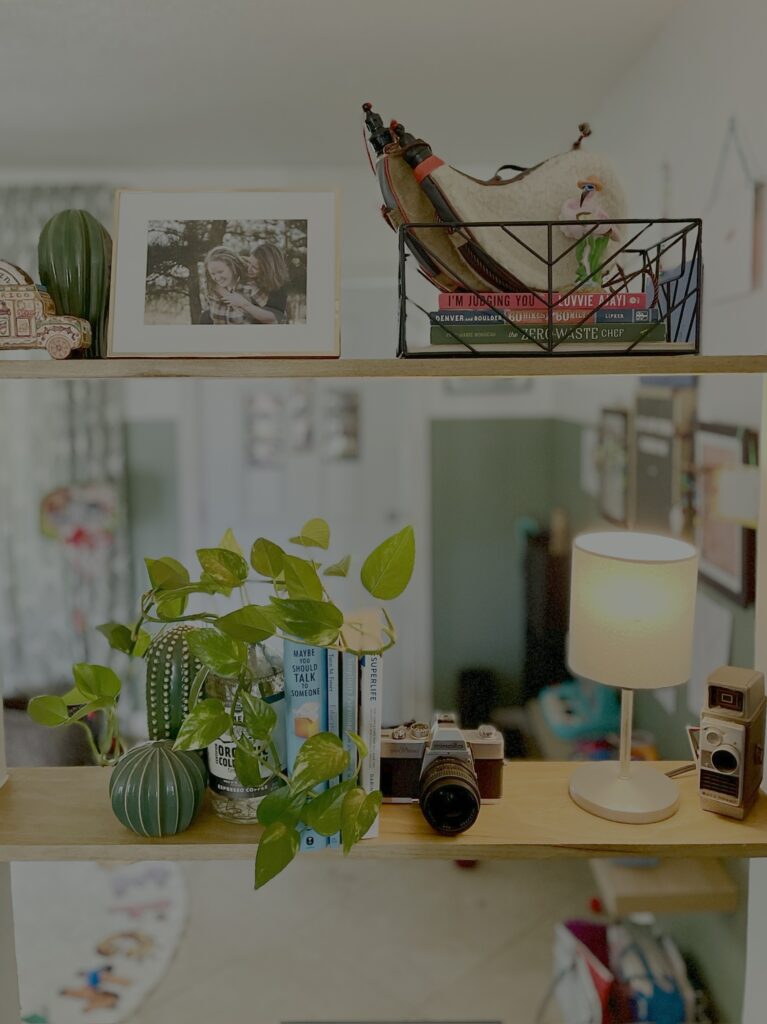
Adding open shelving for display was one of the easiest projects, and I’m so happy to see all the little things I love throughout the day.

At some point in the last 20-ish years, I became very opposed to open shelving. I loved storage with doors and an out-of-sight aesthetic. Having too many things was okay if you were able to organize them in hidden spaces.
As I began to collect my own things, these cabinets became a way to hide excess. Now that I manage a household, I am wildly aware of my own hiding spots. It creates an irrational anxiety to either thorw these things out, or find a permanent place for them to stay.
Over the last 3 years I have used my oversized closet to hide hold things that I wanted to see in our space again. While living in Colorado, I purchased 3 hanging baskets from Ikea to help our house look more appealing to buyers. After we sold, I kept them in storage for years because I could picture them in my future-backyard. As of this month (three and half years later) I have finally mounted two of them outside. I wouldn’t say it was valuable to have kept them, but at this point it’s about principle.
Being an adult with money is great. However, I was not prepared for the number of influencers and must-haves that came barreling at me on social media. It got better when I realized the things I actually wanted.
This project gets to be a coming out party for all the things waiting for the perfect spot. (Happy PRIDE month!)

When we were selling our house in Colorado, our realtor hired a professional stager to come over and help us prep the house.
She had a lot of great suggestions about moving furniture and adding greenery, and the biggest take-away from her hour long visit was when she said “remove anything that makes it look like someone lives here.”
After she left, we were eager to start making adjustments. I quickly moved through each room, taking a picture off the wall in one, and hiding a basket of toys in another. As I walked down to the basement with a single medium-sized box of things that would be kept out of view during house showings, I realized how little of ‘us’ really lived there.
We had white walls, with a collection of mass-produced prints in frames. Any of the decor on the counters and fireplace was Ikea or Target. Same with dishes and linens. It was like we had been prepping to sell for the entire 3 years we lived there.
If we ever decide to move out of our current home, it’ll take a Uhaul to make it look like no one lives here, and once it’s gone, there won’t be much left. That’s the amount of intention I strive to have when filling our space.
Repurposing Unused Shelf Space
Sometime last year, I bought a 10 foot long, 1×8″ whiteboard, and a few plain white brackets. I mounted it just behind our couch. We bought one of those couches that you really sink into, and didn’t anticipate a place to set your drinks once you ‘sank’. I gave it a clear coat, mounted 4 brackets, and screwed it to the wall.
In the, about, 10 months of having it, my wife admitted to always forgetting it was there. So when we rearranged the living room, I thought up a different idea for the board.
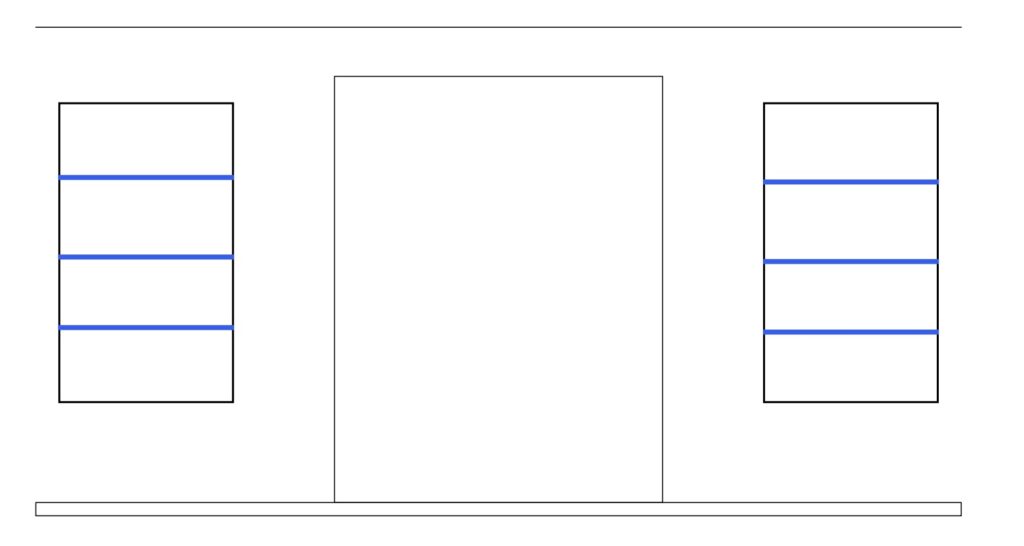
Our living room leads straight into an extra room that is a slight step down. On each side of the entryway, there are two large openings in the wall. Anything in the extra room was very much visible from the living room. I didn’t hate it, but we’re currently using that space as a playroom, and if I’m being honest, nothing in a playroom really looks intentional after a while. You’re just trying to clear a path, not create an attractive space.
This board could be chopped a few times to create some open shelving and fill the open spaces, so I started measuring.
Step 1. Planning
As it turns out, I am not great at visualizing. So the hardest part for me was trying to decide if I wanted two or three shelves on each side. After measuring the height, I marked for each option, and added a long strip of painter tape across the opening first for the three-shelf option, then for the two-shelf option.
Then, I told myself, that was time I would never get back. Unfortunately, it really didn’t help me make any decision.
I am sure that somewhere there is a trained eye who can see blue painters tape and visualize an entire floor plan, however, that is not a skill I have.
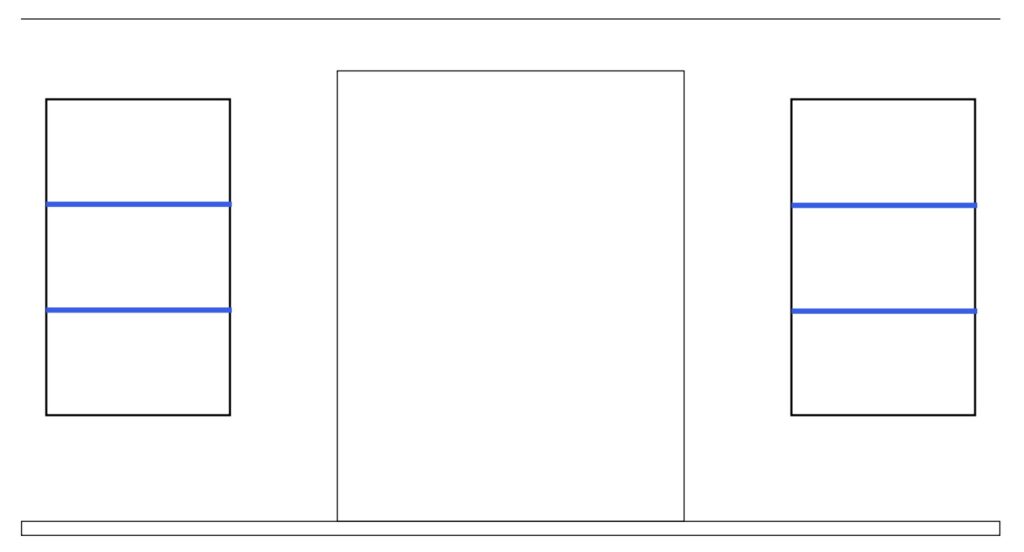
Back to the initial inspiration; to use this 10′ board, and buy as little as possible for this project. With two openings, just about 3-feet wide, the math was telling me I could have two shelves on each side. I needed a little more whiteboard, but luckily I had a scrap piece!
I also tried to picture how I wanted the shelves to look after everything was up. Personal opinion, minimal shelf brackets should not be as expensive as they are. After an extremely brief session of googling how much weight a pocket hole for that size board could support, I felt good about going that route. After all, we’re talking trinkets, not my entire collection of petrified wood.
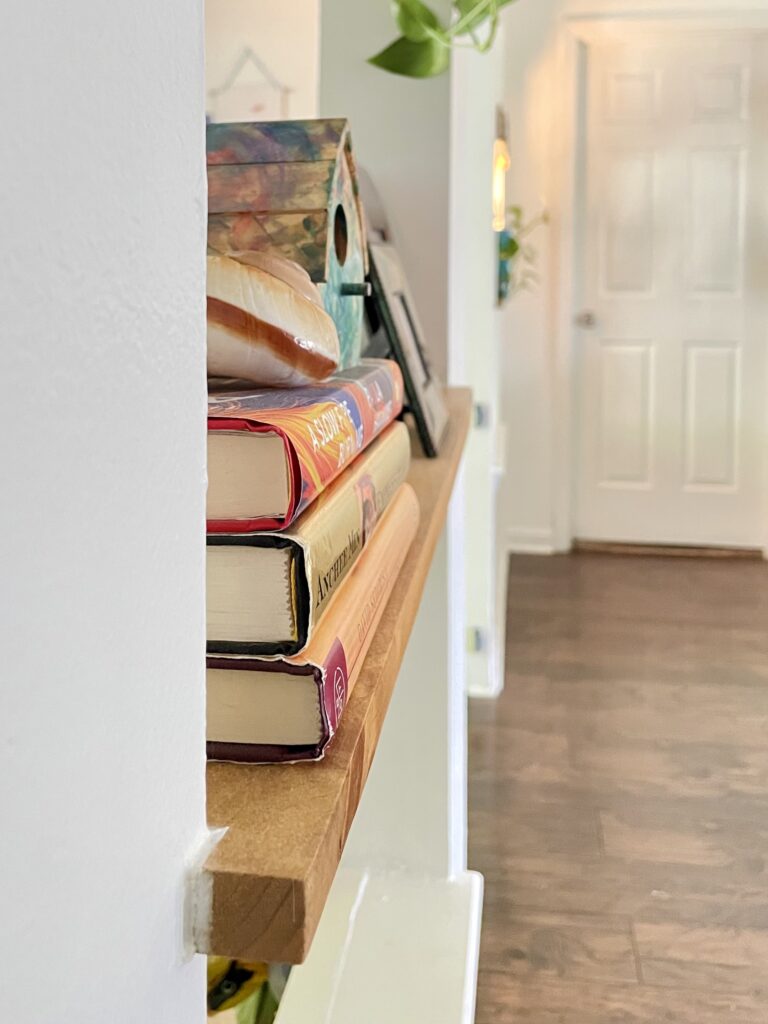
The last thing I wanted to consider was how the shelves would ‘end’. The openings are about 5 inches deep, which really isn’t enough to set too much on without the fear of it being knocked off. With the 8″ board, I wanted there to be an extra 1.5″ sticking out slightly from the front and the back. Definitely not enough for someone to accidentally walk into, but gives enough room to hold things like vases and books.
Since I had a little length to play with, I also decided to make it slightly wider than 3′, bringing the edge about an inch past the opening. The thought was that it would almost look like the open shelving was there before the drywall.
Step 2. Nothing is straight.
While the name of this site is meant to be a fun play on a same-sex couple fixing up their home, it cannot go without saying that literally nothing in a house is straight. Especially walls.
In theory, you just use a little saw to cut a 5-inch wide, 1-inch deep notch in each piece. In reality, the edge of the opening fluctuated anywhere between 4.75 and 5.25 inches. To make things less confusing, I marked the height of where the top of each shelf would be. I then used painters tape on the side of the opening in that spot, and marked the center.

Then, I marked the edges and labeled the tape with which shelf and side. It was important to be carful not to confuse myself so my notes were “Left opening, Top shelf, Right edge”. I abbreviated the first time, and could not remember what those meant, so I do not suggest.
Additionally, I measured straight across the opening, because again, 3 feet was just a suggestion when they were framing these. With all of my pieces of tape and written measurements, I was finally able to start cutting the board!
Step 3. Cut Notches in the Whiteboard
Starting right to left (clearly I am some sort of a monster) I took the length of the opening and added 1.5″. The first cut was the full length of the opening, plus enough for an extra .75″ on either side.
If that makes no sense, I hope these pictures help!

With 4 shelves cut, it was time to make the notches that would fit around the wall of the opening. I marked the middle of each edge, and used my pre-marked pieces of tape to outline where the notch would need to be.

The differences to length and notch sizes were not largely different, but different enough to cause trouble when trying to wedge them in.
I thought initially that I would use my hack saw to remove the notches, but I didn’t think I would be able to get a clean enough cut. Luckily, I had recently bought a Dremel, and I knew that there had to be an attachment that would help make this much quicker!
I picked up a couple of Dremel rotary tool wood-cutting wheels and started inching away at the notches. Honestly, I was a little surprised at how easily the wood cutting wheels worked. I love the idea of a Dremel, but it’s almost like they were seeing how many they could create. It’s probably just a me thing, but it doesn’t always feel super intuitive to find what I’m looking for. I even decided to ask an associate what they thought would work best and they said something like “I can never keep up with which attachment does what”. Either way, I am grateful for such a versatile tool.


Since the board I was cutting was 1 inch thick, and the wheel was most efficient up to 1/2 inch, I had to work in stages. I cut the notches just shy of the total width needed. I want to give myself a little sanding room to smooth it all out without losing too much.
Step 3. Sand and Stain
Since I had already sealed the board with a clear coat before mounting behind the couch, I had to put a little more effort into getting that seal off so that I could stain them.
I started with an 80 grit to strip the top layer, then jumped to 120 Grit for a quick once over, and finally 220 to make it super smooth. Edges needed to be squared, but not sharp, since these would be at bumping height.
We have a small garage, and despite my best efforts, it is cluttered. Since there were only 4 shelves, I wanted to find some where to hang and stain them all at once.
I added an eye hook to one end and hung them from the garage door track. I also decided to use a wood conditioner before staining this time around. The wood had been sealed before, I was worried about splotches and uneven color – despite sanding the shelving down.
After applying a coat of conditioner, I did a couple of coats of MinWax, and then a top coat. I don’t expect anyone to be setting drinks on the open shelves, but I’ve learned that I will set my coffee down anywhere. Better to be safe end up with a ring from a 2-hours-old iced coffee.

Step 4. Pocket Holes & Caulk
A while back I bought a pocket hole jig, and it has definitely won me over.
I have yet to go as far as using the wood plugs for the holes, but I still love a pocket-hole. Even without the plugs, they are an easy way connect things almost seamlessly. Not to mention, you get to bypass buying any sort of bracket!
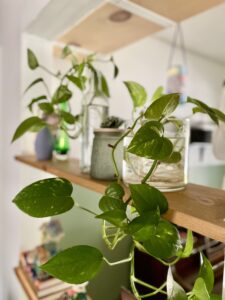
One the shelves dried, I added two pocket-holes to the underside to mount to in the opening. Since the shelves are only 8 inches wide, any more than that seemed unnecessary. Like I mentioned, these shelves are going to hold small books, plants, and trinkets.
Using a laser level, to be sure shelf height matched on both sides, I slid the top shelves in. Then, I lowered the level and mounted the bottom shelves. I leveled in every direction. I worried that I would never unsee crookedness.
As a finishing step, I caulked the small area between the shelf and the wall. I used a matte caulk and just enough to fill the cracks and add a little bit of a seal.
After everything dried, all that was left was to start decorating!

Corrine
Thursday 31st of July 2025
Since comments are closed on the other posts, I am commenting here to say you are like the best mom ever making that rock climbing wall and cool tree mural! Those look amazing and even though I don't have any kids yet I kind of want to build one of those walls in my room too!
Ashley
Thursday 31st of July 2025
Thank you! I didn't realize the other comments were turned off, I will definitely fix that.
Corrine
Thursday 31st of July 2025
These look amazing!