I read a statistic that every 2 minutes, our generation takes more pictures than all of humanity in the 1800’s. In response, we have an eye for finding great spots, in good lightning, with minimal background distraction. Every event deserves a space that is unique to that day, and J’s 5th birthday party was no exception.

However, I had done the balloon garland before. I had also chopped up plastic table cloths and hung them like pompoms (that was pretty cute actually). I remember setting up for a friends baby shower and unwrapping a backdrop filled with woodland animals and some sweet saying about what was coming. Just as expected, when the big moments of the day are happening, it’s these things that end up pictures.
Riding a high from his brother’s birthday just a few months ago, I knew I wanted to include him in the crafting, and that I wanted it to be something I could feel-good about recycling later on, or better yet keep as decoration for the playroom.
We settled on paper chains and got started.
If you are thinking this sounds too simple, it really is. Also, Jay was able to help as much as he wanted since the core of the craft was just cutting and taping.
Step 1. Gather the materials
The easiest list of materials I’ve gotten together in a long time.
– Paper (Pre-doodled on works just as well)
– Glue or tape
– Paper Streamers (left over from past celebrations)
– Command Strips, or tape for hanging on the wall
– Balloons
Other than the balloons, these are all things that I had at home. So it was easy to get started right when we thought of the idea. Which is great, because if you’ve been brain-storming with a small child, then you know they are big fans of immediate gratification
Step 2. Cut Paper into Strips
I started with a small notepad of construction paper that we had hanging around. I cut each piece at about an inch wide.
Probably the least necessary thing that I own, is a simple rotary trimmer. As a photo student in college, and someone who is incapable of cutting a straight line, I have used this $30 contraption way more often in the lat 10 years than I have my arts degree. (Life of a millennial, amirite?)
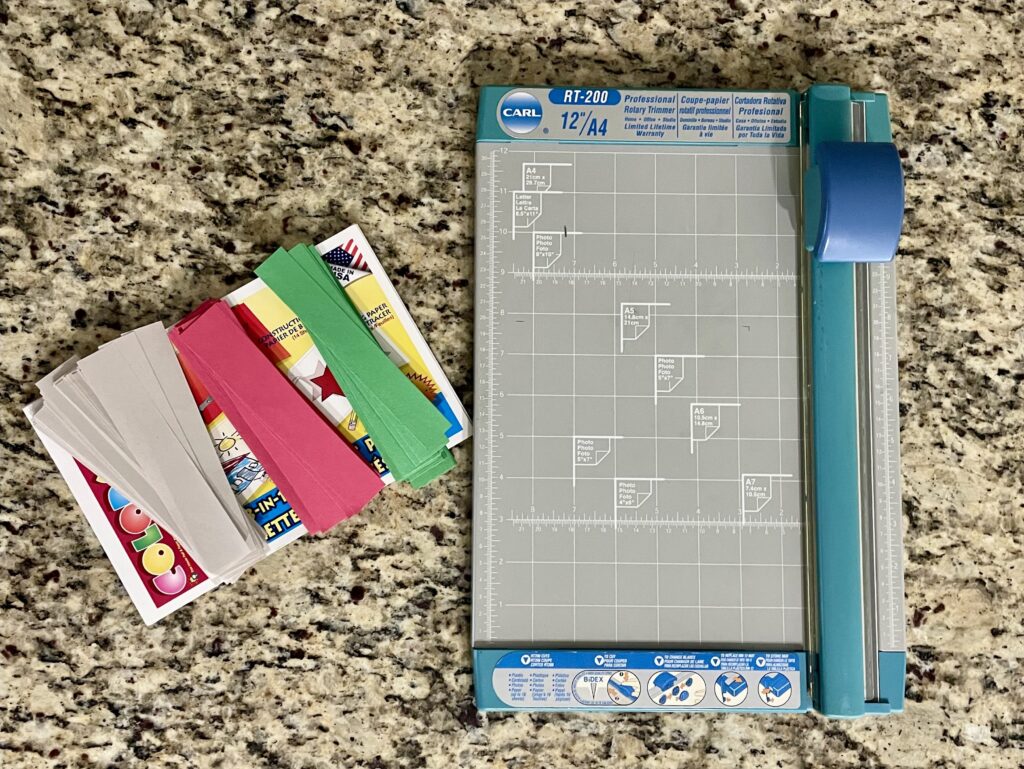
I found one similar, that I can only assume is just the updated version for $35. If you’re the type of person to print your own pictures, I think it’s worth it.
After the initial pieces, I really tried every different size that I could. Using some 9×12 construction paper, I made some 3 inch pieces, and I really liked the look of these after we started putting them together!
Part of what made this such a fun backdrop, I think, was the difference in sizes between each chain.
Step 3. Glue/Tape your chains together.
This might be the most unnecessary statement to explain, so I’ll keep it brief.
J preferred using tape for his paper chains. I would pre cut little pieces and stick them to the side of the table so that they were easy for his little fingers to grab once he needed them.

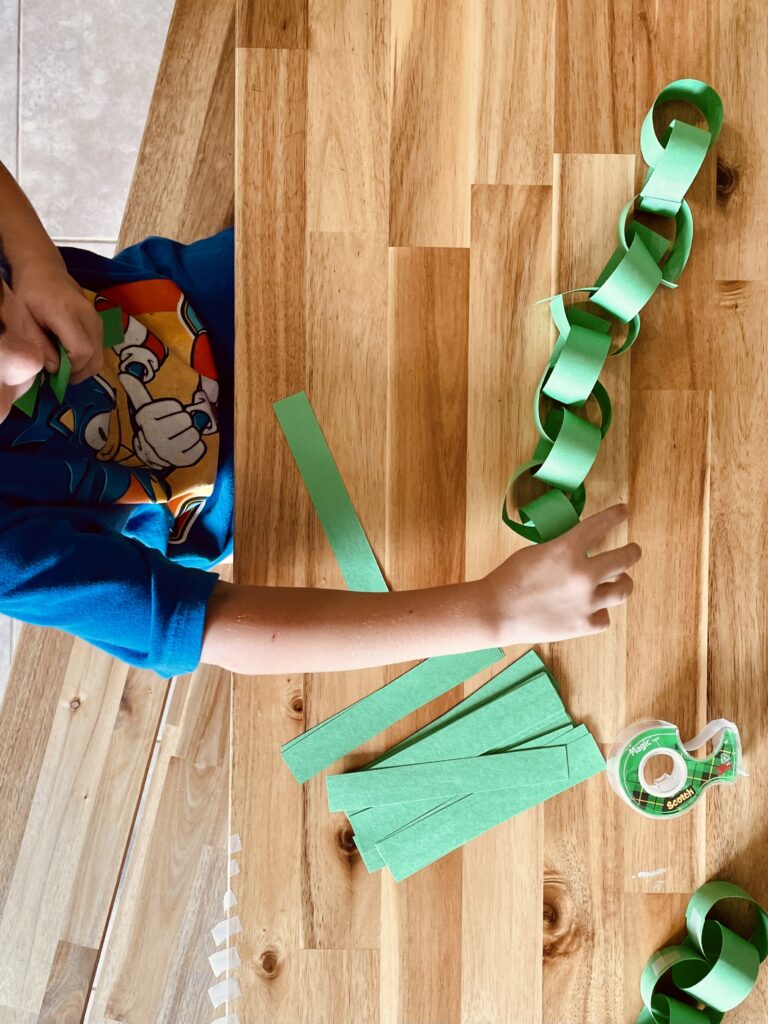
If you’re little is frustrated by not being able to hold the two pieces together with one hand while grabbing the tape with the other, we had more luck putting a piece of tape on one end, then looping the paper through the loop and connecting the tape. J was so proud of how long he was able to make them!
An added bonus of paper chains is the ability to add to, or take apart as needed. I realized after the first couple of strands that for this project, shorter was better.
Step 4. Start Assembling
Once we had a good chunk of paper chains made, I started to play with taping them to the wall. I knew the look I wanted, but I didn’t know the specifics. Luckily, paper chain mounting is pretty forgiving.
I started draping the paper chains across the wall horizontally, and I don’t have pictures because after getting a few strands up, I realized this was not the look.
Changing it up, I adjusted the strands to be shorter, and started taping them across the wall vertically. I liked the way they looked as they were hanging down, and I was able to mix and match the different sizes and lengths.
I started with the big chunky chains to set the width of the backdrop, and then filled in the gaps with smaller, different colored, chains. Another perk of paper chains is how light they are, so just some regular tape kept them up on the wall but was easy enough to remove and adjust.
Step 5. Adding Streamers and Balloons
Last year’s Sonic birthday left me with some blue and yellow streamers. I cut a few strands roughly the same length as the hanging paper chains, and then cut them in half length wise.
I taped them in between, behind, and even to some of the paper chains already hanging. This is simple, but I think it really helped fill the space up.
Lastly, the balloons. Not gonna lie, dollar tree really impresses me with the different balloons. For this, I went with some splatter-paint-esque design, and of course the gold Number 5, as requested by the birthday boy.
That was it! Really easy, kid-friendly, less than $5 backdrop. With a little more time and paper, this could easily be made into a backdrop tall enough for pictures. The very last added bonus, was that paper chains are another welcome addition to the playroom.
